-
Create a New Dial-Up Networking Connection using Windows ME
-
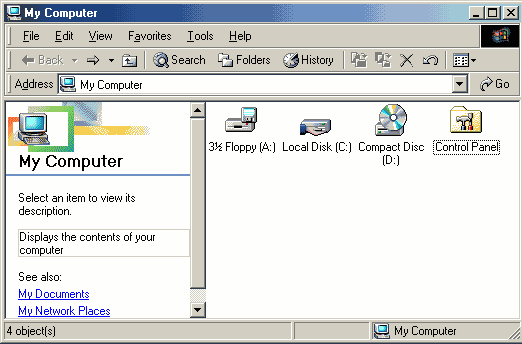
On your desktop, double click the My Computer Icon
-
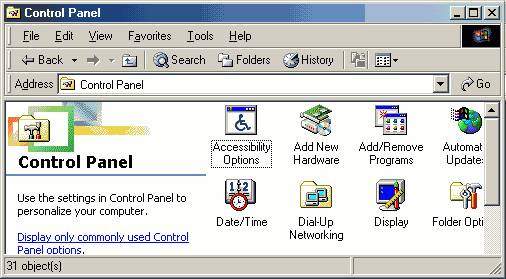
Double Click the Control Panel icon
-
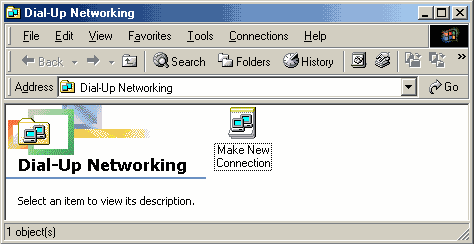
Double-Click the Dial-Up Networking icon
-
Double-Click the Make New Connection icon.
-
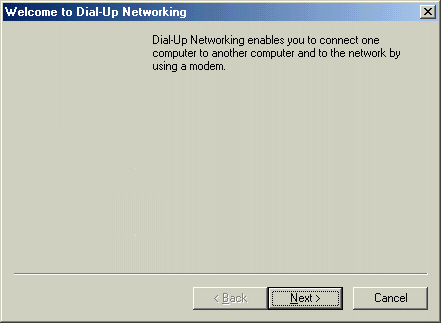
Click the Next button
-
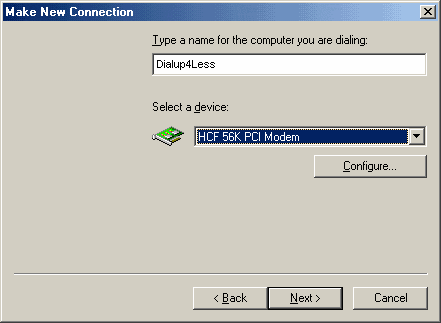
Type in a name for the internet connection (i.e. Dialup4Less)
-
Then select your modem name from the drop down menu
-
Click the Next button
-
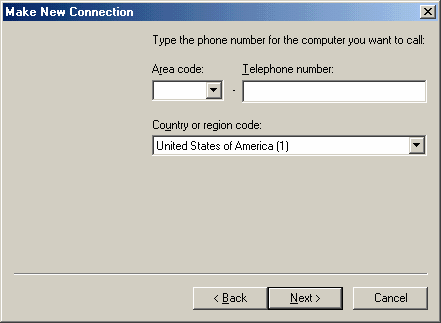
Type in the Local Access number that you will be using to connect to Dialup4Less
-
Click the Next button
-
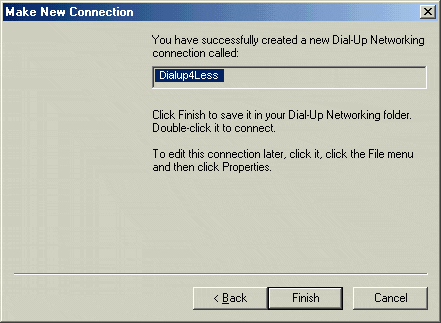
You have now created your Dial-Up Networking connection.
-
Click the Finish button
-
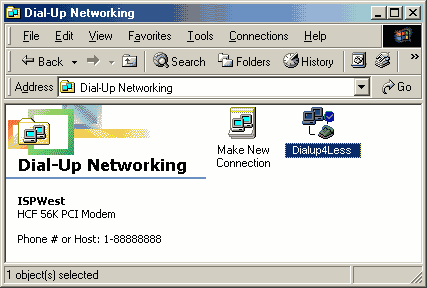
In the Dial-Up Networking window, right click on the Dialup4Less Dial-Up icon
-
Click Properties
-
Under the Networking Tab
-
Under Advanced Options, make sure the “Enable software compression” is checked, and that “Record a log file for this connection” is not checked.
-
Under Allowed network protocols, make sure that “NetBEUI” and “IPX/SPX Compatible” are not checked, and that “TCP/IP” is checked
-
Then click on the TCP/IP Settings button

-
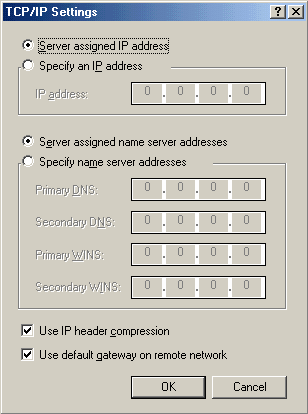
In theTCP/IP Settings window, make sure “Server assigned IP address”, and “Server assigned name server addresses” are selected
-
Also, make sure that both “Use IP header compression” and “Use default gateway on remote network” are checked
-
Click the OK button
-
To create a shorcut on your desktop, right click on the Dialup4Less icon and click Create Shortcut
-
Now, in the Dial-Up Networking window, double click on the Dialup4Less icon to connect to the internet
-
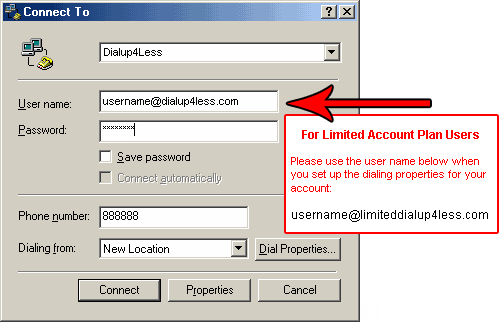
Enter your username. Be sure to add “@Dialup4Less.com” after your username. (Example: username@Dialup4Less.com)
Then type in your password
-
If you are on the Limited Plan you must Enter in @limitedDialup4Less.com after your username ie:
username@limiteddialup4Less.com to be billed correctly!
-
Click the Connect button to log on to the internet
Back to Support Page
Please contact one of our Sales Representatives to discuss your particular requirements at 888-818-0444.